Dev Diary - Week 1: Barnstorming Pitch

For Wednesday, we were assigned to make a pitch video about our Barnstorming / randomly assigned artist game we were going to create. I got the artist Edward Hopper, who was a prominent American oil painter back in the early 1900's. This is the video I made:

As you can see, I wouldn't consider it that much of a pitch. That's because at the time I didn't have a proper idea of what I was going to do. Since his paintings were quite realistic and his ideas of solitude and loneliness were quite abstract for me, implementing that into Barnstorming was not an easy task.

What I did end up going with though, was this:

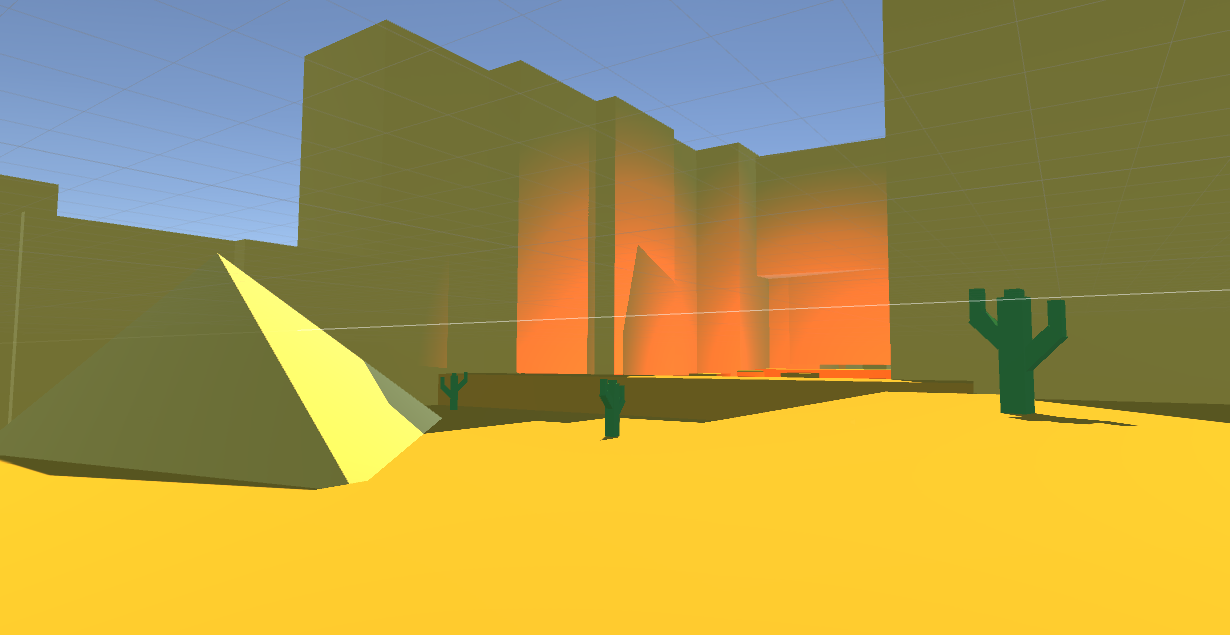
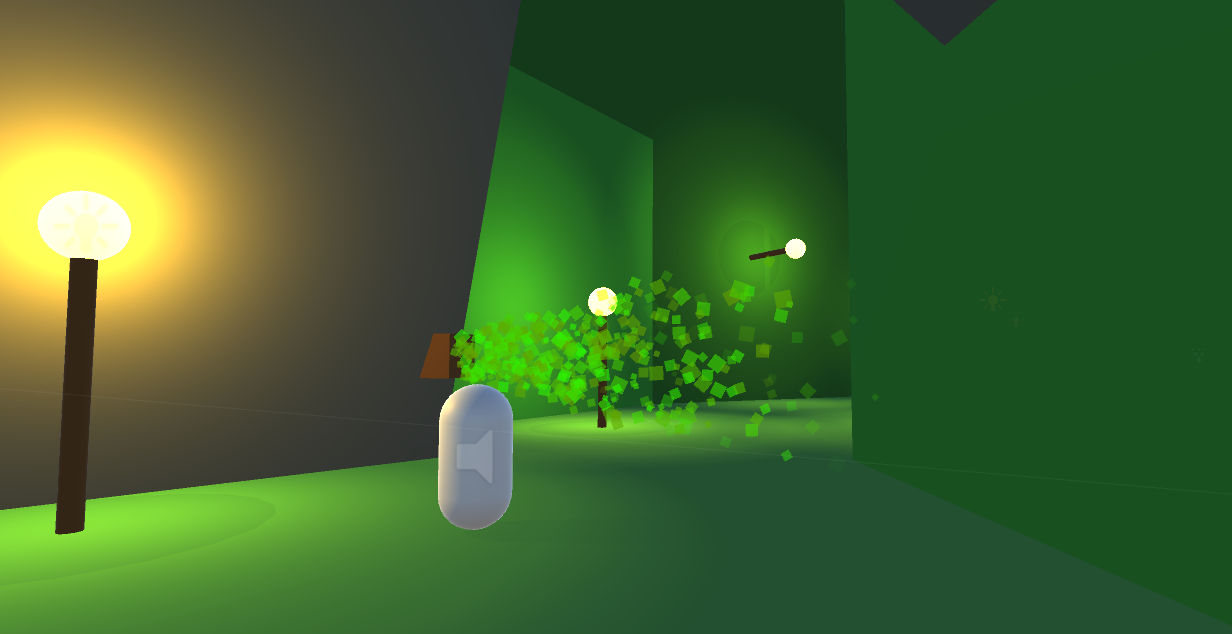
The player is a car driving along a dirt road. They are driving away from the big city, back to the countryside. They need to go through gas stations to progress through the levels and avoid potholes and fallen trees. The player is viewed through the window of a train that is following the car. There will be 3 levels in the game, dawn, dusk and midnight, each with a different difficulty and lighting.

Many of these elements were talked about in the video, as well as discussed during the feedback session afterwards with my group. Feedback was generally good. I did have to explain the odd nature of the video but by the end of it they got a grasp of what I was going on about.

They liked that unlike the original Barnstorming, you can lose my version. If your car gets behind the left border of the train window it happens and my group seemed to like that. They also gave me ideas on what to add like:

  • Have obstacles be cars coming from the opposite direction.
  • Replace the birds with other cars.
  • And some others.

The problem with these ideas though is that it doesn't really go along with the theme of Hopper's paintings. I'm not sure if I explained it well enough in the video, but Hopper was quite a reserved man who saw the crowded big city lifestyle as a lonely one since no one really knows anyone. I want my game to be an attempt to escape the big city life and get back out to the countryside, by the means of many Hopper inspired elements.

Kings of the Arena - Dev Blog #7

Alright, I start uni again tomorrow so this will probably be the last regular dev blog. I'm still going to be working on the project as i'm still enjoying it, just not as often. Now, onto the new features.

Capture.PNG

First, i've added a chat box to the lobby, so that players can talk about what they want to do for the game.

I saw that Photon has their own chat systems, yet for what i'm doing it just seemed to complicated. What I done, was just send an RPC to all clients when a user enters a message. It sends over their player name and message. 

Capture.PNG

Then I added pretty much the exact same chat system for in-game. It's similar to DOTA 2's chat system, where it's in the middle of the screen and disappears after a few seconds. 

That's pretty much it, apart from a few minor additions and changes to existing systems. From now, probably expect another dev blog in around a weeks time, or whenever I implement a major feature.

Kings of the Arena - Dev Blog #6

Alright, in the past 5 days I've probably done the least amount of work on the project so far. That doesn't mean though, that nothing has been done, because stuff has been done.

First of all, I changed the lobby around, so that when you join you are assigned "random team", rather than blue or red. This allows for people to easily switch teams with others if they want, without needing to leave then rejoin again. When the game starts, all players who are assigned to "random team" will be put into a team.

3 players being automatically assigned a team when the game is set to begin.

3 players being automatically assigned a team when the game is set to begin.

Also the 3 game modes have been implemented and are ready to play. Team Deathmatch, King of the Hill and Free for All (which I renamed to Arena).

Team Deathmatch

Team Deathmatch is pretty self explanatory. 2 teams fight to the death, and when the 8 (or whatever) minute timer runs out, the team with the most kills wins. At the moment maps aren't set up, yet when they are, spawns will be random around the map. If there is a tie with the kills at the end of the game, then the team who got the last kill wins the game.

Team Deathmatch UI element, which shows the time remaining and total team kills.

Team Deathmatch UI element, which shows the time remaining and total team kills.

King of the Hill

King of the Hill is a gamemode where 2 teams fight over control of a point. The more players a team has on the point, the faster they will gain ownership of it. When the game timer runs out, the team who has the most control of the centre point wins the game. If there is a tie in control, then the team who is currently gaining ownership wins.

Blue team regains control of the centre point.

Blue team regains control of the centre point.

Arena

Arena is a gamemode where everyone is for themselves. Basically a free for all, after the timer runs out, the player with the most kills wins the game. If there is a tie, then the tying players will have their KD's compared and the one with the best KD, wins.


As a bonus, I also implemented Druid's 2nd ability which is Speed Aura. For 5 second (stats will probably change in the future), all teammates inside of the aura will have a 30% increase in attack speed.

This is the first placeable ability and I added it to enchance Druid's aggressive/support playstyle.

Capture.PNG

Kings of the Arena - Dev Blog #5

It's been almost a week since I've last done one of these. It's not because there's a lack of work being done, it's just that there are large features that are being worked on. So what has been happening? Well i've been doing a couple of play tests. A 5 player test with friends was interesting as the game held up and everything worked out fine.

I also worked on quite a bit of networking problems that occured during those tests, these mainly being synching issues.

dsadas.PNG

A scoreboard was added, which displays player kills, deaths and ping. It also shows the game mode, current map and rules for the game mode.

One of the largest features I added since last time, is a menu with a lobby screen and lobby browser.

What you see in the above GIF, is a player creating a lobby, then switching the game mode for the game. Other players are joining the lobby and then the host starts the game. What I don't like about it though, is the way the teams are set up. When you join a lobby, you are automatically placed in a team and swapping teams can only be done if the conditions are right.

A better solution would be the way Shellshock: Live does it. They have a lobby like this, but each player can switch from no team, to a team. This would allow for people to easily trade teams with each other, rather than needing to leave and rejoin the lobby as it is now.

browsergif.gif

This here is the lobby browser. It displays all lobbies for players to join, along with their game mode and player count.

Kings of the Arena - Dev Blog #4

I've been working on the game for quite a bit lately. Additions to the ability system, UI, projectiles and more have been worked on. I also had my first proper play test that isn't just me trying to control 2 games at once. My friend and I spent around 15 minutes messing around in-game. Overall, it was better than I expected.

Before hand, I though the first initial gameplay was going to be unbalanced and not that fun if you're just spamming projectiles at each other. Yet when playing with another person, we both found it to be quite fun. Trying to hit our target by predicting movement, and using the abilities at the right times to give ourselves an advantage. The experience was great and I can't wait to test again, and with more people.

Archer's Fury ability. Temp extra attack speed.

Archer's Fury ability. Temp extra attack speed.

Archer's Poison Arrow ability. Poisons target overtime.

Archer's Poison Arrow ability. Poisons target overtime.

Mage's Ice Shard ability. Temp stuns target.

Mage's Ice Shard ability. Temp stuns target.

Mage's Shield ability. Temp blocks 50% incoming damage.

Mage's Shield ability. Temp blocks 50% incoming damage.

Cleric's Blood Syphon ability. Temp transfer health over time.

Cleric's Blood Syphon ability. Temp transfer health over time.

Assassins Killing Blow ability. Deals large damage.

Assassins Killing Blow ability. Deals large damage.

Above is a collection of the abilities that I have currently made. The values and stats for each are just placeholders, so what you see above won't be the final result. Each of the abilities also encourages that specific character's playstyle. The Mage has a shield and stun to encourage defensive behaviour, while the Archer has a poison arrow and increased attack speed to encourage aggressive behaviour.

Along with all this, the UI elements have also been implemented, to give the player many visual cues.

When they cast an ability, a cooldown timer appears on the ability icon, counting down in seconds.

If the ability has a temporary effect of the player, then there will be a purple bar above the icon, showing remaining duration.

The circular icon to the left, is just that character's defa

GIF5.gif
GIF6.gif

Something else i've been thinking about is game feel. In a game like this, the player needs to know if they've hit their target or when they have been hit.

So far I have screen shake when you get hit, sprite colour flashes for direct and poison damage, and a blood particle effect when a player dies.

For the future though, I currently have these ideas in mind:

  • Have a red vignette for when the player is almost dead.
  • Have a distinct sound when you hit an enemy.
  • Have the ability icon flash or pulse forward when casting it.
  • Have the ability icon flash or pulse when it is ready to be used again.

When I started these dev blogs, I said that i'll be doing around 1 or 2 a week. Well in the past 1 week and 1 day, i've already done 4 of them. This is good though as I do like making them. In the future though, i'd expect not to do this many as the time to implement new features will just keep rising. Hopefully by next week i'll have done a playtest with around 5 people, just to test how the game goes with that many people, and server issues. 

Kings of the Arena - Dev Blog #3

These posts might actually come out more often than I mentioned. I've been working quite a lot on the project and I think that there's enough progress for an update.

There's quite a lot of stuff to process in that GIF. The first thing you saw, was probably the character select screen. Whenever a player joins a game or dies, that screen pops up, allowing them to select a character to spawn as. 

I've added screenshake when you get hit. This still needs tweaking.

 
Here's a logo that I whipped up. Probably not the final version, but I really like it.

Here's a logo that I whipped up. Probably not the final version, but I really like it.

 
Capture.PNG

That's the character roster. The Druid also finally has a skin. When drawing the sprites for the characters, I wanted them each not only to have a distinct colour, but to also have distinct features.

  • The Archer is the base/default look.
  • The Mage has a beard.
  • The Cleric has a mask and hair.
  • The Druid is bald.
  • The Assassin's face is almost all cloaked and they don't have brown shoes.

I've also been messing around with followers. One of the Druid's abilities, is to spawn a follower that can attack nearby enemies. At the moment it can just follow the player around and look in the direction of the player.

I'm still wondering if it should attack automatically when enemies are nearby, or attack when the player attacks. If when the player attacks, then should it find an enemy in that direction and shoot towards that, or just in the same general

Capture.PNG

Above are the current projectiles that I have made for the game. Look at them and think what a major problem would be in-game... They blend into the ground too much. If you are running around trying to fight other people, a core part of the game is being able to avoid enemy projectiles.

The rock, health shard and ice shard blend in too much with the ground.

Capture.PNG
Capture1.PNG

The fire ball for example. When it moves, there is a trail and particle effect attached to it. It's easy to see.

Then there's the rock, which when moving is not that easy to see. It blends in with the pattern of the grass, even though it's a different colour overall. I believe a solution would be to add a trail like the fire ball or make the rock spin as it's being thrown. This will hopefully make it stand out more.


Since each character will have 2 unique abilities, i've been working on a modular ability system. First, I though about the different types of abilities. These are: projectile, self, placeable, follower and allies.

  • Projectile abilities, are like normal attacks but can have higher stats and different effects attached.
  • Self abilities, are cast on the player themselves. Temporarily giving them extra stats like armour or attack speed.
  • Placeable abilities, are objects that the player can place. Like mines, goo or turrets. These are just ideas at the moment though.
  • Follower abilities, are spawnable creatures that can help the player in different ways. This can be attacking enemies, healing the player over time or other things.
  • Allies abilities, are abilities that affect the entire team or nearby teammates. This can be a heal, armour or other things.
download (1).png

Each player has an Ability Manager, which sets abilities when a new character is chosen, casts those abilities and manages cooldowns. Each Ability class contains the basic data. Like name, description, cooldown, sprite icons. Everything that all abilities have. 

Then there are the 5 (so far) distinct ability classes. These are ProjectileAbility, SelfAbility, PlaceableAbility, FollowerAbility and AlliesAbility. They each are contain data for that specific ability type. Each Ability class connects to one of these distinct ability classes. I know it's not that well explained, just know that doing this allows for modular abilities. So adding new ones or changing existing ones in the future is much easier and faster. 

Kings of the Arena - Dev Blog #2

Alright, so production of the game is underway. My main focus for the past few days has been on setting up the networking and making sure everything is properly synchronised. I'm using Photon for the multiplayer, which is very similar to Unity's built in networking. I've used Photon before on previous projects, so using it here would be the obvious answer.

In the above GIF you can currently see movement synchronisation and client-side hit detection. I'm controlling the player on the left, yet my on the right looks quite weird. The movement looks floaty and not rigid at all. This is due to the clients sending data 20 times second and setting that directly will make the movement look very choppy. So what we need to do is lerp towards the sent position data. This is why in some parts of the game to the right, the movement "jumps forward", as the lerp needs to catch up to the newest position recieved. 


I've also been working on the menu flow. This being the process of which a player gets from being on the main menu, to being in a game.

download.png

When players are in a lobby they will be automatically be placed in either red team or blue team. Only in the lobby can players change teams. They can only change teams though, if their current team has the same amount or more players than the other team.

Also in the image you see "When start conditions are true". These are the conditions for the game to begin. They are:

  • There must be at least 1 player on each team.
  • All players must be "Ready" by clicking the ready button.

Once that is done, a 15 second countdown will begin, allowing for more people to still join, or for players to "Unready".


In the last post I mentioned a couple different game modes, yet didn't really go into detail about them. At the moment I have 2 that I want to implement and another in my mind, just so that the game won't be stuck to one game mode that will get boring overtime. There are a few similarities that all the game modes have, these are:

  • Each game mode can have a minimum of 1 person each team, with a maximum of 5 people each team.
  • Each game mode will run for a maximum of 5 minutes. This number might change in the future, yet this is in place because I want quick games. Similar to Rocket League, which allows people to play short, yet numerous amounts of them.

Now that that's done, here are the game modes that I have in mind for the game:

Capture.PNG

Deathmatch

Your traditional team deathmatch where 2 teams battle it out to the death. After 5 minutes, the team with the most combined kills wins the game.

Capture.PNG

King of the Hill

2 teams fight to claim ownership of the center piece. When a team's ownership reaches 100%, they win. Ownership can be increased by having a majority of your team's players on the pad. There is also a 5 minute timer, which at the end, if no team is at 100% ownership, then the team with the most wins.

Capture.PNG

Free For All (not sure...)

At the moment a free for all game mode is iffy in my mind. I would like to add it, yet I don't believe that it will fit in with the style of game. For example, playing as a support character like the Cleric would be very weak in this gamemode.

That's all so far. In the next update, I will focus more on what has been done on the game, rather than ideas for the future. If you have any suggestions or questions, ask away. 

Kings of the Arena - Dev Blog #1

For the next 3 weeks i'll be on uni holidays and have decided to create a game that i've had in my mind for quite some time. It's a 2D, top down, multiplayer arena shooter game. A lot to take in, but I can't really explain it in just one sentence. I've had the idea actually for this type of game for around 2 years. In January of 2015 I actually even attempted to make it. It worked, kinda. The multiplayer was a bit finiky, but the overall attacking and killing other players worked out fine.

Kings of the Arena, January 2015. Unfinished, and badly made game.

Kings of the Arena, January 2015. Unfinished, and badly made game.

That's what it looked like. You controlled one of 3 different characters and could shoot projectiles to kill enemies. Each character also had a unique ability, like an arrow burst, invisible or shield. It was kind of similar to a MOBA, where there are the unique heroes with their different stats and abilities. 

At the time of making it, there was no real goal. There was no game modes, no kills required to win - it was an incomplete project.

For the past 2 weeks though, i've been planning a "remake" which will be similar to the original game, yet more carefully designed and complex. The game will be like this...


Kings of the Arena will be a top down 2D, MOBA style shooting game. 

  • There will be a range of characters, with each having their own projectile and 2 unique abilities.
  • The primary source of attacking other players is by shooting a character specific projectile. These projectiles can be dodged by players. 
  • All projectiles deal only damage.
  • There will be a number of different game modes: Deathmatch, King of the Hill and maybe more.
  • The maps will be sized appropriately so that encounters happen regularly.
  • Games will last around 5 minutes.
  • The game will be fast paced. Players will be constantly moving to attempt to avoid enemy projectiles and engaging in combat.
  • Abilities can be projectiles, shields, spawnable followers, auras, for allies, etc. Very similar to those that can be found in DOTA or other MOBAs.
  • Abilities have a cooldown after they are used.

Already in the planning stage i've set out 5 different characters. The Archer, Mage, Cleric, Druid and Assassin. Their design, stats and abilities aren't final, but here they are:

Capture.PNG

Archer is aggressive and will shoot arrows. First ability shoots a poison arrow, second ability puts Archer into a fury mode, temporarily giving extra attack speed.

d.PNG

Mage is defensive and will shot fire balls. First ability shoots an ice shard which stuns target, second ability shields Mage temporarily, blocking 50% of incoming damage.

Capture.PNG

Cleric is support and will shoot wooden spikes. Cleric is special, since they have a secondary attack that shoots small health balls which can heal allies. First ability is a mass heal which heals all allies for a bit, second ability is a syringe projectile which draws health from target overtime and gives it to the Cleric.

Capture.PNG

Druid is a support/aggressive and will shoot rocks. First ability spawns a small creature which follows Druid and shoots at enemies, second ability makes Druid temporarily shoot higher damage but slower rocks.

Capture.PNG

Assassin is aggressive and will shoot daggers. First ability is blink which allows him to teleport a short distance, second ability shoots a high damage dagger.

I've mentioned this game being similar to a DOTA style MOBA, yet really its most comparable game would probably be Overwatch. The different characters have their own playstyles and abilities and there are a range of different game modes for quick play. That is what I want from this game. Quick, in and out play, with games being around 5 minutes long. It should be a game that anyone can pick up and play for as long as they want.

The big question now is... will I even finish it. If you have ever looked at my portfolio, you would see that many of the games I attempted to make in the past have not been finished. That can be due to lack of knowledge, pre-planning, scope and overall goal of the project. For this one though, I have all those things. Doing these blogs regularly would also probably motivate me to keep working on the game and who knows what it will be like 3 weeks from now.

So when is the next blog and how often will I be working on this project? Well, i'm hoping to release a blog around 2 times a week, or maybe even 1 - we'll need to wait and see. I'm also hoping to work on this quite regularly as i'm currently on 3 weeks holiday from uni, so that will give me plenty of time. Also i'm pretty bad at explaining ideas and a lot of this will probably be rambling, so if you still don't really know what sort of game this is going to be, just imagine 2D Overwatch for now. See you soon.

Dev Log #10

This dev log will be a review/kind of post mortem for my typing game assignment.

Capture.PNG

Overall, the project went well and I'm happy with the final outcome. The game runs smoothly, yet there are a few problems I have with it that are quite minor yet are still a annoyance.

First, I wish I had used more events in the game. When I first started on the project, I didn't really use that many events. Only really for the letter inputs and that was it. I only started to use more events and add them to existing systems around a week before it was due. In total there are around 4 events that are used throughout the game. I think there would have been more if I made the base of the game revolve around them.

Another problem is one that is code side, yet I cannot find a solution to it. Each area has a certain amount of enemies that need to be killed in order for the player to move onto the next area. For some reason, sometimes when all the enemies of an area have been killed, the kill count is 1 or 2 less than it needs to be and the player wont move. This is probably not a bug and more sloppy code, but looking over it I cannot find a solution. Every time an enemy dies it adds one to the currentEnemiesKilled variable and every frame the game checks that to see if all the enemies have been killed. This is one of those problems that if it does occur, it messes up the whole game and requires either a restart or a manual setting of that variable to trigger the player movement onto the next area.

This of course could have been avoided if I planned the system ahead of time. Because what I do most of the time is just jump into coding and make it up as I go. In this case though, planning how the system would word would have been a big help.

One thing that I haven't done before that I did do for this project, is pooling particle effects. Since every time an enemy gets hit and killed there's a particle effect, pooling them would make the game run faster and overall be more efficient.

The way it works, is that at the start of the game, it instantiates a set number of game objects for each particle effect. Let's say 10 for example. These 10 of each particle effect then go in lists and can be called upon when needed. So when an enemy gets hit, it looks for a disabled hit particle effect, sets its position and disables it after a certain amount of time. Doing this type of system is good practice for when I perhaps go onto making a larger game and instantiating every time something needs to be done would be too laggy.


Dev Log #9

The typing game is coming along nicely. 

The above image shows the boss battle which happens after the player goes through the 4 areas. It has its own health bar, music and death animation. The words are also harder than all the others in the game to make it a challenge for the player.

The way he works, is that once the last enemy of area 4 gets killed, a BeginBossBattle event gets called. The boss begins to move towards the player at a slow pace. If the boss reaches the player before getting killed then it instantly kills the player.

One of my favourite systems in the game is the scoring system. Every enemy killed by the player grants them an additional 10 to their score. Also every enemy kill increases the player's multiplier which affects the enemy kill score. Although if the player presses the wrong letter on a word, their multiplier goes back down to 1. There is a max of 10 on the multiplier.

At the end of the game, if the player wins or loses they are presented the game over screen which shows them their score and stats. The final score is affected by their game score, words per minute, health and if they killed the boss or not.

goScore.text = "Score: +" + Game.game.score + "\nWPM: " + Game.game.CalculateWPM() + " +" + (Game.game.CalculateWPM() * 10) + 
            "\nHealth: " + Player.player.health + " +" + (Player.player.health * 10) + ((Player.player.health > 0)?("\nKilled Boss: +1500") :(""))
            + "\n\n<b>Final Score: " + Game.game.CalculateFinalScore() + "</b>";

Displaying this text requires quite a long line of code as seen above.

Capture.PNG

Another thing that I implemented was a muzzle flash. Every time the player enters a letter correctly, the muzzle flash enables then disables quickly, to simulate shooting. Like on the previous assignment, I used Emission on the material to make the flash look like a light source, as well as actually having one on top of that. Doing this just provides more visual feedback to the player so that they know the letter they typed was correct instantly.

Dev Log #8

This week I worked on the assignment and made a start to it. I decided to make the camera orthographic and aiming at an angle, since it looks better than a perspective camera in this case. I also got the idea of doing that from the production assignment i'm currently working on, in which we have the same camera set up.

The player can't move and needs to kill a certain amount of enemies before moving onto the next area. In total there are going to be 4 areas with probably a boss battle at the end.

In the above image you can see the enemies with the text boxes above their head. For the assignment we needed a lot of visual and audible feedback. So when a player inputs a letter, it checks all the current enemies to see if their first letter is the one pressed. If so, then that word becomes the current word. The text box gets a green highlight and that UI element renders in front of everything else so that it is in full view and that the player can easily see it.

The text that the player hasn't typed is grey, typed is green and current letter is white. When an enemy dies the screen shakes. This is also the same screen shake effect from the previous assignment.

//Called if this is the current word and a letter is inputted.
    public void UpdateWord ()
    {
        string fullWord = wordToType.word;
        string progress = wordToType.curTyped;

        if(fullWord.Length == progress.Length)
        {
            wordText.text = "<color=lime>" + fullWord + "</color>";
        }
        else
        {
            string green = progress.Substring(0, progress.Length);
            string curLetter = fullWord.ToCharArray()[progress.Length].ToString();
            string end = fullWord.Replace(progress, "");
            end = end.Substring(1, end.Length - 1);

            wordText.text = "<color=lime>" + green + "</color><color=white>" + curLetter + "</color>" + end;
        }

        //Increase size of word box.
        transform.localScale += new Vector3(0.02f, 0.02f, 0.02f);
    }

Each UI word object has the above script. The function is called when the OnLetterInput event is called. It updates the word's text to display what was mentioned above. There is a lot of cutting up and trimming of strings to create a final line of text. Also as a bonus for feedback, the word box increases in size with each letter input.

If the inputted letter is not the correct one corresponding to the current word then the text will flash red, with the same code as the enemy flash in the previous assignment.

The above code took me a bit to get working correctly. When I first wrote it, my understanding of Substring was totally backwards. I though it cut out that part of the string rather than cut out the other part. Sounds weird, but just think of Substring backwards. When I understood it though, the code ran pretty much perfectly. 

Another thing that I think should be mentioned, is how are the words selected. Well, I have 2 text files with 300 words each. One for easy words and the other for medium words.

//Loads the 2 easy and medium word files and puts them into lists.
    void LoadWords ()
    {
        string[] easy = easyWordsFile.text.Split("\n"[0]);
        string[] medium = mediumWordsFile.text.Split("\n"[0]);

        for(int x = 0; x < easy.Length; x++)
        {
            string e = easy[x].Replace("\r", "").Replace("\t", "");
            easyWords.Add(e);
        }

        for(int x = 0; x < medium.Length; x++)
        {
            string m = medium[x].Replace("\r", "").Replace("\t", "");
            mediumWords.Add(m);
        }
    }

The above code loads in the words from the text files. It first gets the string value of each file and then splits it into a string array every new line.

Then, it just loops through those arrays, filters out any hidden characters and adds them to their corresponding lists.

Selecting words is just as easy. When the game wants a new word it send over a list of existing words that are currently on the screen. The script filters out all words beginning with those existing letters and sends back a random word to be used.

Dev Log #7

This week in class we went over events. I found them really interesting in the way that they can be created and just added to without that much extra code. 

41966-unityeventoverride.png

In the inspector, the events have their own UI which allows the user to add listeners. It makes it much easier to add listeners than it is to add them in code.

With this we also got our second assignment. We need to create a typing based game which use events, states and NavMesh movement. We were shown examples in class and I think I will go for an enemy wave typer game. Enemies will come at the player and they need to type words in order to kill them.

On the topic on NavMesh, I found them quite complex yet also quite simple. You're able to set up areas with different costs, so that having a path going through it might be more or less desirable. An example would be if there were 2 paths to a target. One over a bridge and another through water. The cost of going over the bridge would be much less than going through the water, so the agent would most of the time go over the bridge. If it was blocked by something though, the agent would go through the water.

Capture.PNG

The image above shows the agent options for the navmesh. The Agent Radius is the thickness of the agent character. From what I could see, this is also the distance that the navmesh edges will be from the obstacles. I don't really like this and believe that the distance should be a separate option. Because what this does is that is makes the agents hug the walls when moving or turning corners. This looks bad and unrealistic so I set the agent radius to around 2 or 3 times the actual radius, so that there was a gap when turning corners. It makes it look more realistic.

One thing I really like though is the Max Slope and Step Height. You're able to choose the max angle of which an agent can walk up as well as the highest step they can take. The step height could be used for stair cases, yet that will probably make the agent jump, so having the staircase as a slope would be a better option. 

Dev Log #6

This dev log will be kind of a post mortem but more of a review for the assignment that I handed in last Friday.

Overall, the project went well. What I envisioned, mostly agreed with the final result. There were features though such as multiple weapons, different enemy types and more abilities that I did want to implement, yet the scope prohibited that. This is probably due to time constraints and the fact that I wan't always on top of the project. Lacking behind and working on it in bursts, rather than gradually over the assignment time probably lead to this dilemma. In terms of problems with the implemented features, there were a few.

The first problem would be the camera. It has a simple 3D orbit around the player, yet if you look up too high or down too low, it can glitch it out and cause the camera to snap there. This is most likely due to my modifying the euler angles of the camera parent directly, rather using a quaternion function. The snapping into place is due to me clamping the camera rotation. I clamped it so that the camera can't rotate around a full 360 degrees vertically, yet that seemed to cause this problem. I know know that it's due to just adding to euler angles and messing up with the rotation numbers. Further research and learning into that area would help in future projects with a 3rd person camera.

Another problem that I mentioned in an earlier dev log is the shooting. Shooting a physical projectile in a 3rd person game is a hard thing to do as the projectile cannot move in a straight direction without being misaligned with the crosshair. It shoots a raycast from the camera and if it hits something, the projectile moves towards that point. But what if the player shoots into the sky? For this, I just made the projectile move in a general direction towards the crosshair. It looks ugly but hopefully the player won't be shooting in the sky anytime soon. For this reason I was not happy with the shooting and still believe that there is a better solution to the problem. There is raycasting and damaging the enemy instantly on contact, yet that wasn't really how I wanted to go about with this project. Mostly all other 3rd person games that have guns use raycasting, so maybe I should follow them and use that for future projects.

Dev Log #5

This is the last week for working on the assignment and the game is pretty much complete.

These 2 images are levels 2 and 3. They both have their distinct characteristics, with the caves being closed in, dark/blue and the desert being open and bright/orange. The emission lighting can be seen in the caves again, this time blue to emphasise the deepness/darkness of the level. Also now all the levels have certain obstacles which can only be completed with the correct ability.

The Jetpack can be found in the first level and is needed to get to areas in that level. In the second level (the caves), the shrink ability is found and needs to be used to get out. Finally in the desert level, both of those abilities need to be used to get to the end and to complete the game. 

In the desert level you can see that there are cactus'. These damage the player when they touch them with a simple OnCollisionEnter. At the back you can also see a bright orange glow which is lava. This lava damages the player overtime if they are in it with a similar script to that of the poison gas.

Capture.PNG

The UI is quite simplistic yet displays quite a bit. At the top the player's health can be seen both in a number form and in a health bar form. Originally, I was hoping to add in multiple weapons, so that is why there is the pistol in the circle to the left. On the bottom right though are 2 icons. One for the jetpack and one for the shrink ability. These are either enabled or disabled depending on whether or not the player has that ability.

The health bar also moves down gradually when they are damaged, rather than just snapping to a value. This is done with this code:

//Smoothly lowers the player's health bar.
    IEnumerator HealthDown ()
    {
        Player p = Game.game.player;

        while(healthBar.value > p.curHp){
            healthBar.value = Mathf.MoveTowards(healthBar.value, p.curHp, 20 * Time.deltaTime);
            yield return null;
        }
    }

A simple while loop with Mathf.MoveTowards is all that is needed to create this effect and it greatly improves the look of the game. 

Once the player completes the game, the above screen is displayed. It allows the player to enter in their name and submit their score. If the score is in the top 10, then it will be saved to a Json file, so that it can be loaded up again and displayed on the main menu.

The serialisation and deserialisation is done using this code. I was also contemplating on whether or not to use Json or XML. From what I could see, they are both generally the same and work in the same way. Although I chose Json, since it is what we learned in class and there is generally more documentation on the topic. Although in this post it can be seen that Json is more compact and more flexible. XML does have some benefits, yet for a small game such as this one, Json works just fine.

Dev Log #4

This week I started working on the actual levels and details on my assignment. My plan is to create 3 levels. The first will be a green mountain level, the second a cave level and the third will be in the desert.

The image above is of the first level, mountains. One thing that I discovered that you can see in the image are the lamp posts. They are just a sphere on top of a cylinder with a light, yet the sphere is different. It has a material which emits light, independent of it's surroundings. This is why it actually looks like the lamp is emitting light.

I also worked more on the enemies. First, they only follow the player around if they can see them. This is done by shooting a raycast towards the player and if it doesn't intercept a wall, then the enemy can see them. This is so that enemies don't try to walk through walls and only engage with the player if they can see them.

I also implemented more "game feel" to provide the player with more visual feedback. The first thing was damage flashing. When the enemy or player gets damaged, their material flashed red for a few frames to show that they have been damaged.

    public MeshRenderer rend;   

    //Called when damaged. Flashes enemy red quickly.
    IEnumerator DamageFlash ()
    {
        rend.material.color = Color.red;
        yield return new WaitForSeconds(0.03f);
        rend.material.color = Color.white;
    }

As you can see, it's a very basic block of code. It's simple but works effectively. 

Another thing I implemented was camera shake. When the player get's hit, kills an enemy or uses their jetpack the screen will shake to show that it is indeed happening.

//Shakes the camera for a duration by an amount and intensity.
    IEnumerator ShakeCam (float duration, float amount, float intensity)
    {
        Vector3 targetPos = Random.onUnitSphere * amount;

        while(duration >= 0.0f)
        {
            if(Vector3.Distance(cam.transform.localPosition, targetPos) < 0.05f){
                targetPos = Random.onUnitSphere * amount;
            }

            cam.transform.localPosition = Vector3.Lerp(cam.transform.localPosition, targetPos, intensity * Time.deltaTime);

            duration -= Time.deltaTime;
            yield return null;
        }

        cam.transform.localPosition = Vector3.zero;
    }

The camera shake code takes in 3 variables. A duration, amount and intensity. The way it works, is that it first finds a target position. This is done by using Random.onUnitSphere multiplied by the amount. It will find a random unit in a spherical area. Then, it moves the camera to that position at the speed of the intensity and when it arrives at that position, a new target pos is found. 

The image above shows the poison gas, which damages the player if they're inside it. The script emits the particles for a certain amount of time in certain intervals to give the player enough time to cross. In this case, the gas emits for 3 seconds with 2 second intervals. If the player is inside the trigger of the gas while it's emitting, they will be damaged 5 hp every half a second.

Dev Log #3

This week we were assigned our first assignment. We had to create a simple 3D game with 3 levels, pickups and triggers. I went for a 3rd person shooter game. During this first week, I got the 3rd person camera done, as well as the player controller, 2 abilities and basic enemy.

Capture.PNG

For the 3rd person camera script, I first got the mouse x and mouse y inputs and put them into a vector3. Then that rotation was applied to the camera parent's euler angles. This creates a rotating camera, yet looking too far up or down glitches it out.

To the right of the image are the 2 abilities. One is a jetpack and the other is a shrink ability. In the levels the player will need to use these to get past obstacles. When on the ground, these abilities have a particle effect, purple light and bobbing effect. This effect makes the ability go up and down as well as rotate. This makes it easier for the player to see.

//Do we bob up?
        if(bobUp){
            transform.position = Vector3.MoveTowards(transform.position, bobToPos, bobSpeed * Time.deltaTime);

            //Are we close to the peak?
            if(Vector3.Distance(transform.position, bobToPos) <= 0.1f){
                bobUp = false;
            }
        }else{
            transform.position = Vector3.MoveTowards(transform.position, defaultPos, bobSpeed * Time.deltaTime);

            //Are we close to the bottom?
            if(Vector3.Distance(transform.position, defaultPos) <= 0.1f){
                bobUp = true;
            }
        }

        //Rotating the object.
        transform.Rotate(Vector3.up * rotateSpeed * Time.deltaTime);

This is the code for the Bob.cs script and it's quite simple. It moves the object up and down around one unit in distance and rotates it at a certain speed. Instead of a static object sitting there, this bobbing object attracts the eyes of the player and makes the game look even better.

Also in the image, but not seen is shooting the enemy. The player can shoot spherical projectiles, but a problem that I occured is where do they shoot towards? Obviously ahead of the player, but since it's a 3rd person camera where does the player aim? Aiming with the crosshair is a problem since the projectile is shooting at an angle towards the crosshair and only crosses it at a single point. 

So what I decided to do was have the crosshair shoot a raycast and if it hit an enemy, just have the projectile fire towards the enemy. If it wasn't an enemy, then the projectile would move in that general direction. Most 3rd person games don't need to worry about this since they shoot with raycasts only, yet with this project I was using physical objects.

//Calculating the direction the projectile will travel.
        if(Physics.Raycast(Camera.main.ScreenPointToRay(new Vector3(Screen.width / 2, Screen.height / 2, 0)), out hit, 100)){
            hitPos = hit.point;
        }

        Vector3 dir = Vector3.zero;
        
        if(hitPos == Vector3.zero){
            Vector3 camDir = (transform.position - Camera.main.transform.position).normalized;
            dir = new Vector3(camDir.x - 0.3f, camDir.y + 0.45f, camDir.z);
        }else{
            dir = (hitPos - transform.position).normalized;
        }

This is the code and it does what I mentioned before. I wouldn't say this is the best method since it's really hacky and doesn't even look that good. Although for what I need it for, it will do.

Dev Log #2

This week in class we were tasked to create a small ragdoll game. Me and my teammate just decided to create a simple tool which would allow you to hit the ragdoll with an amount of force. It was quite basic but fit the criteria for the class.

The "game" had 2 different values you could change. Gravity and Physics Tick Time. Changing them did a few things but overall not a lot. This small project was just to mess around with ragdolls.

One thing that was pretty cool, was the camera script. The camera is able to zoom in and out as well as orbit around the ragdoll.

void Zoom ()
    {
        cameraDist += Input.GetAxis("Mouse ScrollWheel") * -zoomSpeed;
        cameraDist = Mathf.Clamp(cameraDist, minZoom, maxZoom);

        Camera.main.transform.localPosition = Camera.main.transform.localPosition.normalized * cameraDist;
    }

The above code shows the zoom function. It's pretty simple, as it gets the axis of the scroll wheel which is between -1 and 1, which can then be scaled to change the camera's local position. 

void Orbit ()
    {
        if(Input.GetMouseButtonDown(1)){
            mousePosLastFrame = Input.mousePosition;
        }
        
        if(Input.GetMouseButton(1)){
            Vector3 mouseDir = Input.mousePosition - mousePosLastFrame;

            transform.eulerAngles += new Vector3(mouseDir.y, mouseDir.x, 0) * sensitivity * Time.deltaTime;

            mousePosLastFrame = Input.mousePosition;
        }
    }

The orbit function is a bit more complex. When the player holds down the right mouse button, they can move the mouse to orbit the camera around the ragdoll.

It does this by knowing both the mouse position of the current frame and the last frame. From this, it can find a direction and then apply that direction to the camera's euler angles.

Dev Log #1

This week, I mainly worked on improving my uni game jam project, Toxic Townsmen. If you haven’t seen it already, it’s a 2D wave shooter set in medieval times. It has 9 waves of enemies and a boss at the end. This past week I just spent a bit of time tweaking values and changing some features. When I originally posted the game, I made a mistake and forgot to change the player’s attack rate from 0, to 0.2 (from testing the game). So when people were testing it, the game felt easy as the player could fire as much as they wanted to. Fixing this was easy, and along with this fix, I also added another wave and made the boss harder.

Why? Because when I saw people playing the game, even though there was the firing bug, they all beat the boss on their first play-through. My intentions for the game was to make it difficult to defeat the boss. The player should lose around 1/3 of their health by the time they reach him on a good play-through, and then have a hard time defeating him. So I increased his health, made him do a quick-fire special attack when his health gets low and increase fire rate as well.

The mage enemy also had a few changes. Their homing orbs were made slower, so that they travel slightly slower than the player, rather than the same speed. This makes it so that the player can avoid them, yet have them still being an annoyance.

Also in the week, I helped my team member create our ragdoll physics game for week 2’s game jam. I worked on making the camera easier to use by implementing a zoom feature and the ability to orbit the camera around the ragdoll.

The zoom feature was created using the code below. Scrolling the mouse wheel either adds or subtracts the cameraDist variable, which is clamped to a min and max zoom. This variable is then used to calculate the camera’s position and distance from the target.

void Zoom ()
{
cameraDist += Input.GetAxis("Mouse ScrollWheel") * -zoomSpeed; cameraDist = Mathf.Clamp(cameraDist, minZoom, maxZoom);
Camera.main.transform.localPosition = Camera.main.transform.localPosition.normalized * cameraDist;
}

For the camera orbiting, I got the direction of the mouse movement and converted that to movement in the camera’s parent rotation. For this to work though, the camera needs to be a child of an empty game object that is at the position of the target you want to follow.

void Orbit ()
{
if(Input.GetMouseButtonDown(1)){
mousePosLastFrame = Input.mousePosition;
}

if(Input.GetMouseButton(1)){
Vector3 mouseDir = Input.mousePosition - mousePosLastFrame;
transform.eulerAngles += new Vector3(mouseDir.y, mouseDir.x, 0) * sensitivity * Time.deltaTime;
mousePosLastFrame = Input.mousePosition;
}
}